klartext in a nutshell: How to use the speech input from anymize
On Friday, klartext came to the Mac. Our speech input now runs on Windows, macOS, and Linux. It's high time for a tour: This guide shows you step by step what klartext can do and how to use it. From the first dictation…
By ·

On Friday, klartext came to the Mac. Our speech input now runs on Windows, macOS, and Linux. It's high time for a tour: This guide shows you step by step what klartext can do and how to use it. From the first dictation to the meeting transcript.

Ready in three steps
- Download the app from anymize.ai/produkt/klartext for Windows, macOS, or Linux.
- Log in with your anymize account, the same one as in the web app.
- Press the shortcut and start speaking.
On the Mac, klartext needs permission for accessibility features to insert text into other programs. You can see the status in the app's settings.
Dictating with the Klartext mode
You press the shortcut, speak, and press it again. klartext turns what you say into clean text: uhms, slips of the tongue, and false starts are removed, grammar and punctuation are correct. Your words remain your words.
The text lands directly where your cursor is. In the email, in the Word document, in the browser, or in your specialized software. After that, klartext restores your clipboard.
| Windows · Linux | macOS | |
|---|---|---|
| Start and stop klartext | Ctrl + Space | Option + Space |
| Cancel recording | Esc | Esc |
Tip: You can change the shortcuts in the app's settings.
Sensitive dictation with the Protected mode
For anything confidential, there is the Protected mode. Names, addresses, phone numbers, and other personal data are anonymized before the AI sees them. In your text, they appear as placeholders, and klartext shows you how many items were protected.

| Windows · Linux | macOS | |
|---|---|---|
| Start and stop Protected | Ctrl + Shift + Space | Option + Shift + Space |
The Protected mode is available in German, English, French, Spanish, and Italian.
Recording meetings
klartext also records your calls. To make this work, you need to enable “Record meetings” in the settings once.
After that, when a meeting starts, for example in Teams, Zoom, or Google Meet, klartext recognizes it and asks if you want to record.
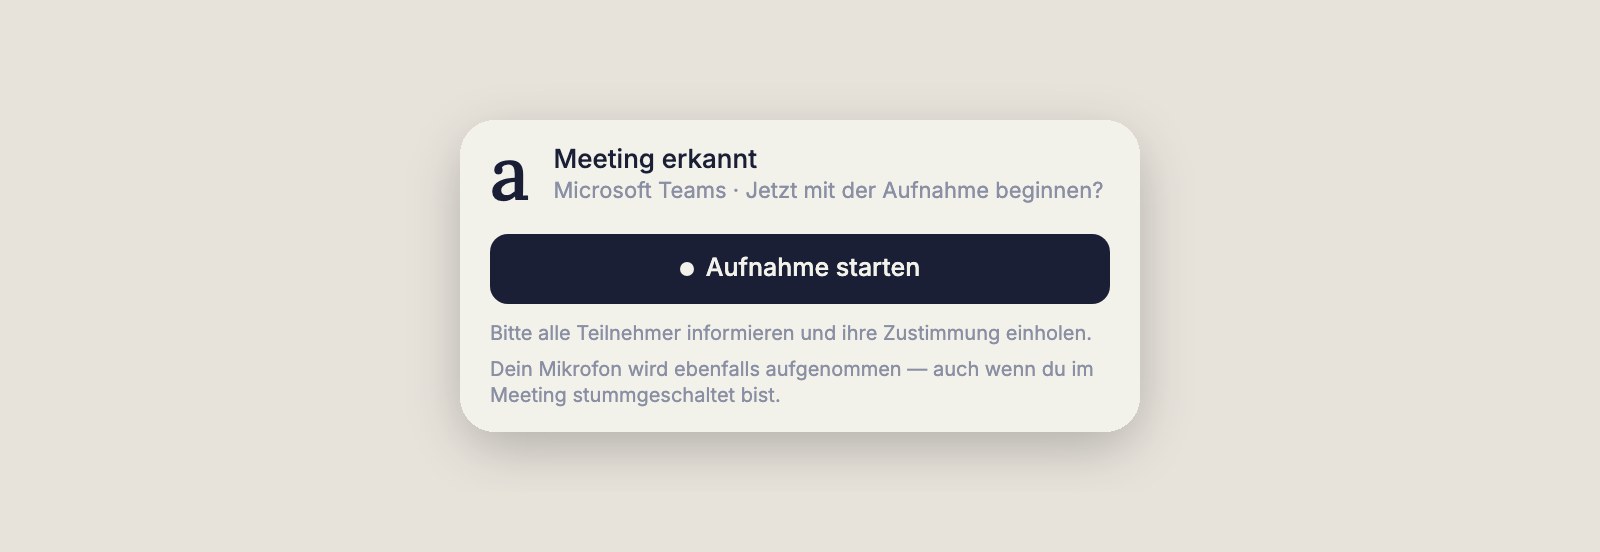
Don't want to be asked every time? With “Automatic recording”, klartext starts directly. You can also start a meeting manually at any time via the klartext icon in the menu bar or in the notification area.
The audio of the meeting and your microphone are recorded. Important: If you mute yourself in Teams or Zoom, others won't hear you, but klartext will continue to record your microphone. And remember to inform all participants and obtain their consent. On the Mac, klartext needs permission for “Screen recording” for this. A video is not recorded.
Notes and highlights during the call
While the meeting is running, klartext shows you a small window. There you can write notes that will be timestamped in the recording. You can mark an important moment with the flag without typing anything. Pausing and ending can be done with a click.

The transcript
After the meeting, you receive the transcript with speakers, anonymized if desired. You can open the summary with a click in anymize. You can export the transcript as a PDF or share it via email directly from the app.

You decide how long meetings are stored: indefinitely, 7, 30, or 90 days. And if the computer crashes in the middle of the call, klartext saves the recording for the next start.
Your vocabulary: Dictionary and text modules
In the Dictionary, there are terms that klartext should spell correctly: technical terms, names of procedures, abbreviations from your daily life.

Text modules save you recurring paragraphs. You set a trigger, for example, “Normal finding,” and the text that will be used for it. When you say the trigger while dictating, klartext inserts the entire paragraph.

Find everything again in the history
In the history, all dictations and meetings are stored. You can search them, filter by Klartext or Protected, rename them, listen to the recording, and have them transcribed again. You can anonymize a klartext entry afterwards. And every dictation can be exported as a PDF.

Under Statistics, you can see how much you have already dictated: recordings, words, your words per minute, and your current series.

Which languages klartext understands
If the transcription language is set to “Automatic,” klartext recognizes 13 languages, including German, English, French, Spanish, Italian, and Portuguese. You can select German, English, French, Spanish, Italian, and Norwegian.
The shortcuts at a glance
| Windows · Linux | macOS | |
|---|---|---|
| klartext | Ctrl + Space | Option + Space |
| Protected | Ctrl + Shift + Space | Option + Shift + Space |
| Cancel recording | Esc | Esc |
Pressing again ends the recording. You can change all shortcuts in the settings.
Data protection
klartext processes your speech on servers in Germany, in compliance with GDPR. In Protected mode, personal data is anonymized before an AI sees it.
Try it out yourself
klartext is available for Windows, macOS, and Linux. Download here. You can find more details in our documentation.